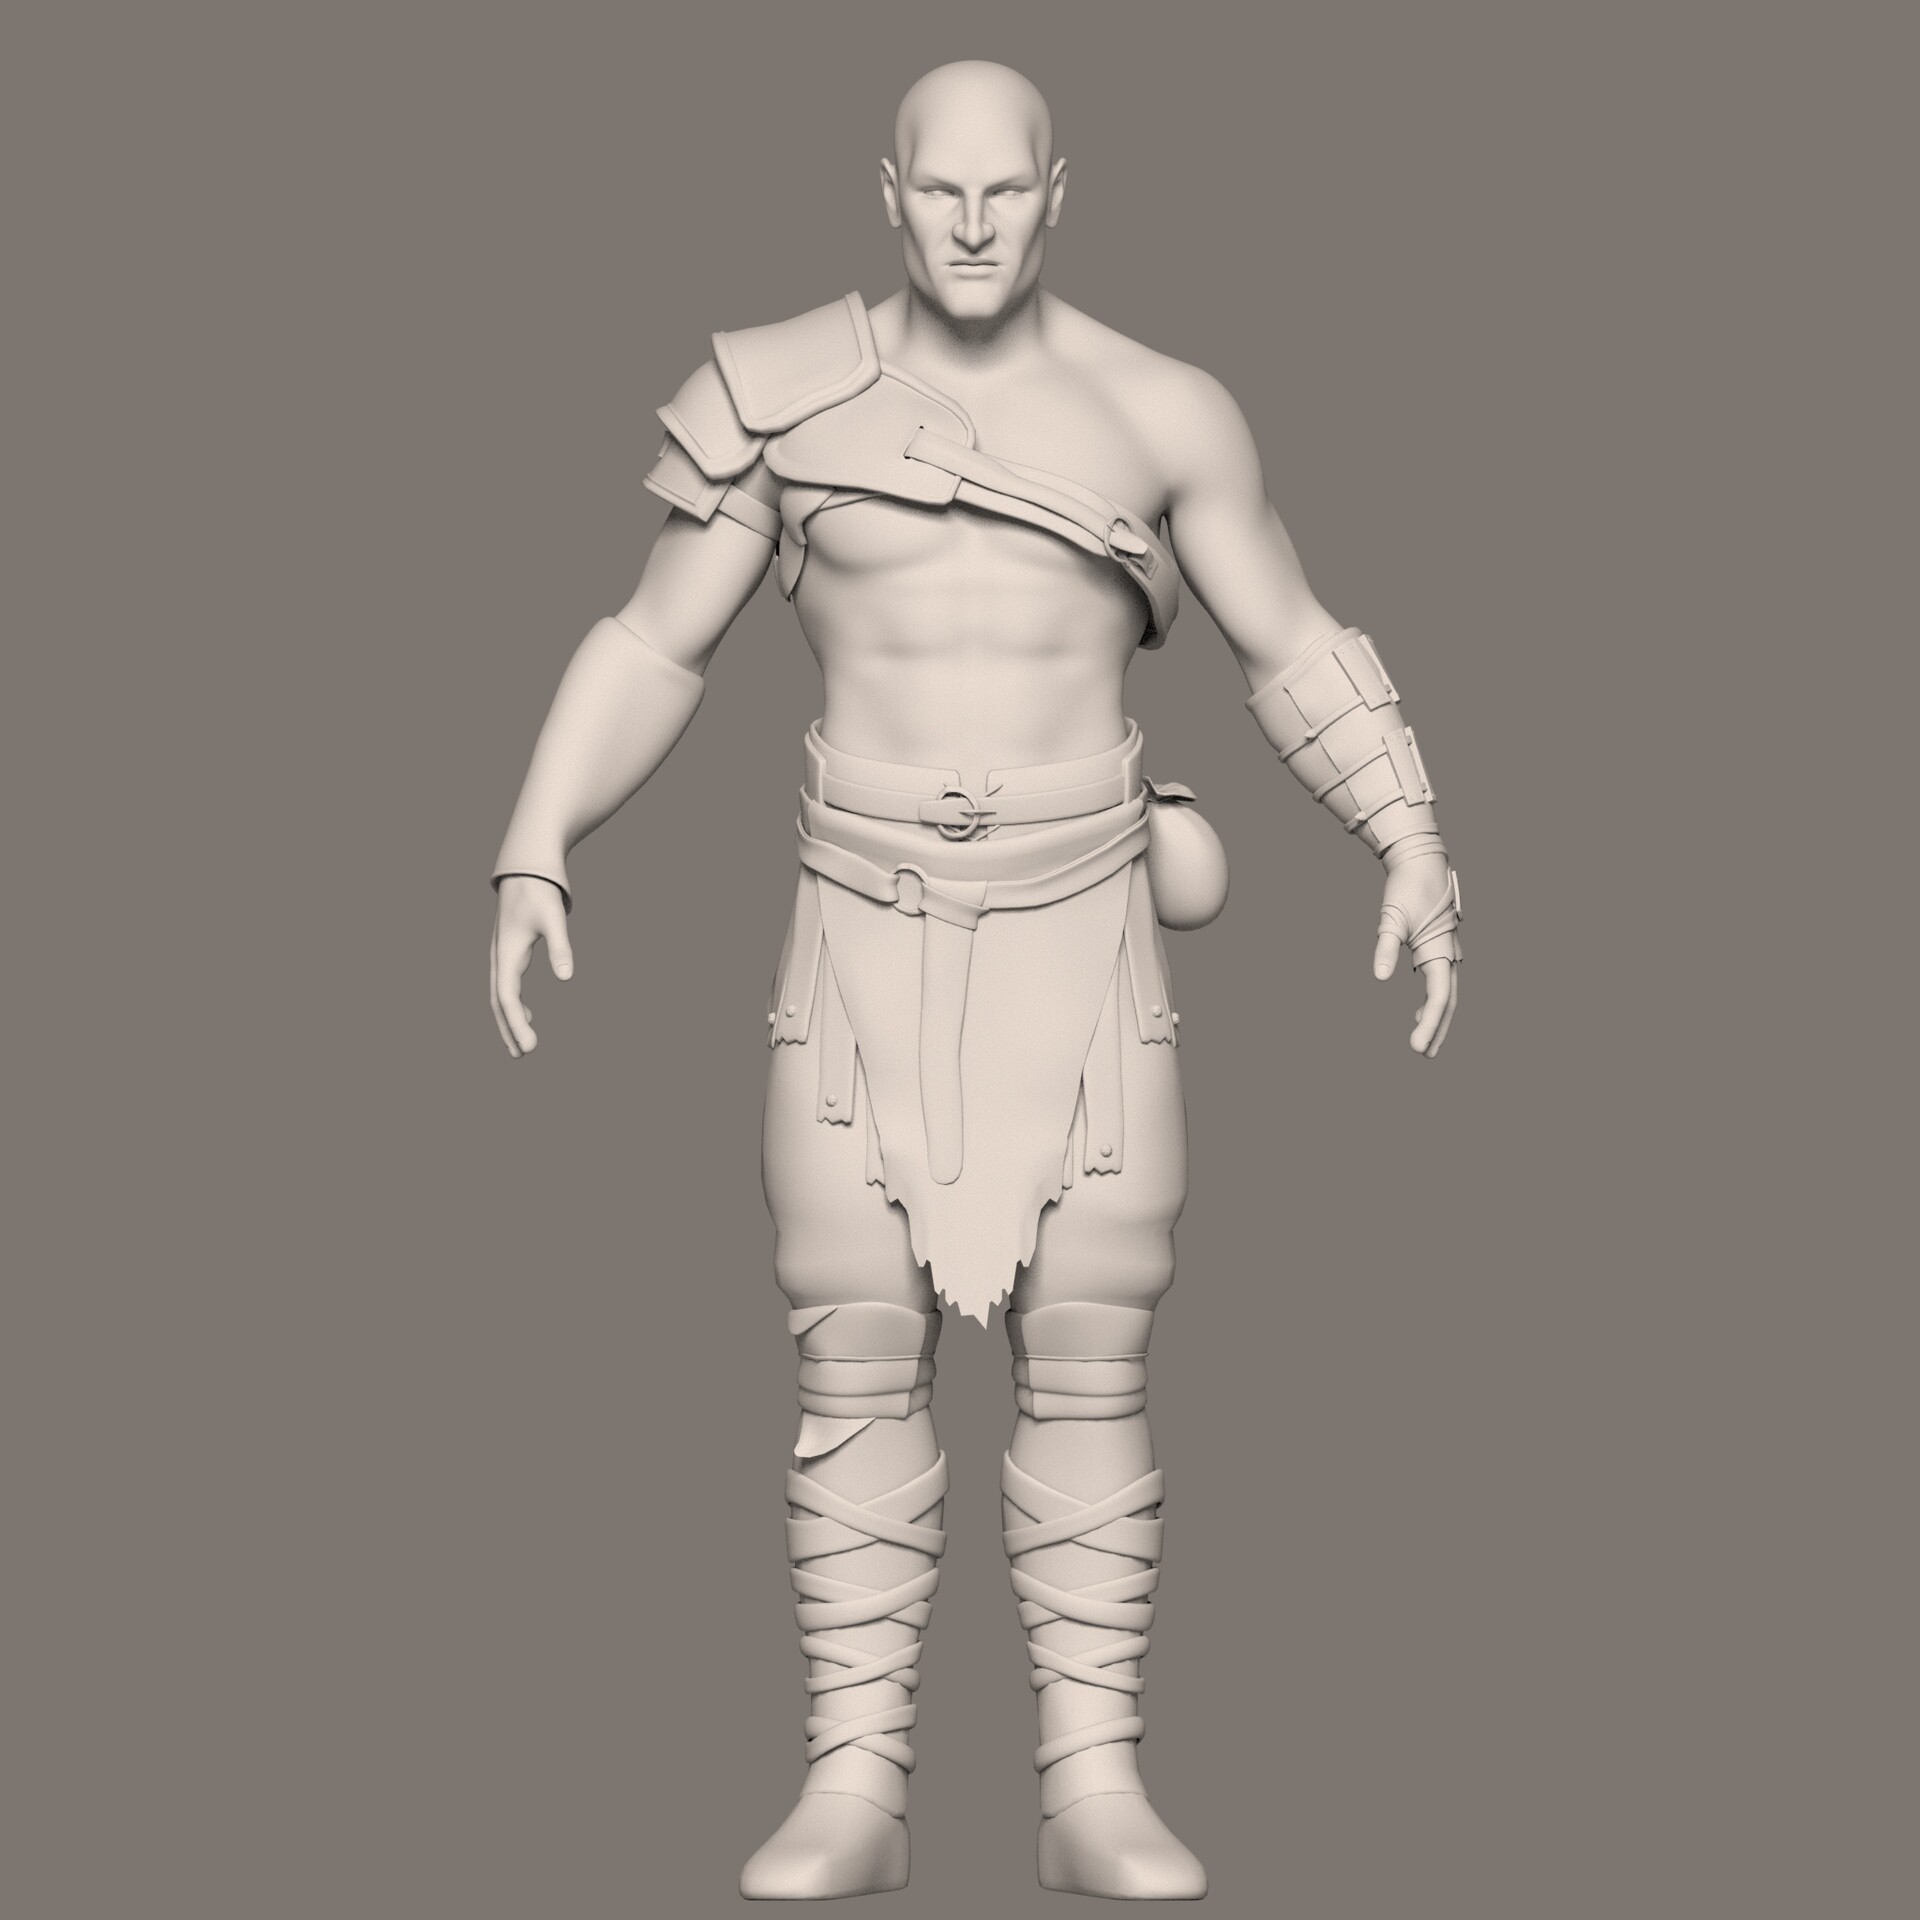
KRATOS 3D CHARACTER MODEL
So here it is! Kratos 3D model . #Completed
Share your reviews in comment section below 💕.
Also share it if you like it. ❤.
Been working on this project from past few weeks and I am so glad to share it with you guys. My one the best model till now I have created and of course this is not the end... Coz there whole lot of new stuffs to know about and to create and so on. So lets keep improving and keep creating. 💛
___________________________________
And a special thanks to one the best best teacher I have ever got in this field, who helped in this project and many more things.
One and only - Dibya Sir 💙
How I created this:
Firstly I created the base mesh in Maya (Last 2 Images)
2nd - Did the Unwrap in Maya (Created the UV's in UDIMS)
3rd - Exported my Model into Zbrush for Texturing (Sculpting the major and Finest details and Diffuse paint).
4th - Exported the all the Maps from Zbrush : Displacement Map, Normal Map, Diffuse Map (All in 8k Resolution)
NOTE : 1-The Specular Map was created manually inside of Zbrush by cavity masking technique and I also hand painted the areas where I don't need specular .
2 - Created the roughness map from Specular Map ( Just Invert the Specular Map in Photoshop or in Arnold . Depends on you)
3 - I used the Diffuse Map as Subsurface Scattering Map.
5th - Switched to Maya : Placed all the Maps of the model to its respective places and tweaked some values and done.
6th - I used XGEN in Maya to create Eye Brows, Beard and Chest part Fur Hair.
7th - Rigged the Model inside of Maya for Posing my Character for Render.
8th - (I render in ARNOLD in the Resolution of 7k) Setup the scene and light for render.
9th - Final Image Composited in Photoshop.
Important Note - I created the cloths texture with the mix of two Software ( Zbrush and Photoshop)
Sorry for not mentioning the process of Cloths Texturing, because its a bit tricky for me to explain by writing down here. You can text me or mail me if you are Interested to know about the process of Cloth Texturing.
Thank You.